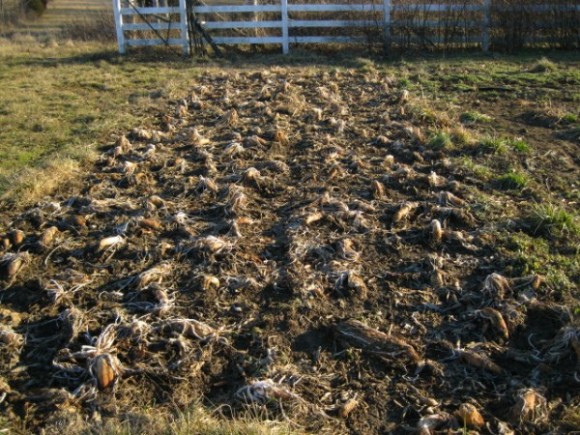
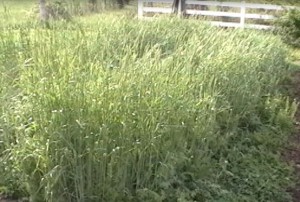
cereal rye and hairy vetch bed
Covering cropping is an excellent addition to any gardening or mini-farming venture. If you’ve seen some of my recent posts, you know that I have been focused on expanding my use of cover crops to improve the heavy clay soil conditions of our mini-farm and homestead. I’ve been experimenting with a few cover crops over the last couple years including cereal rye and alfalfa. Most recently, I’ve started experimenting with the Tillage Radish.
There are many benefits to cover cropping that I’ve written about in the past including:
- Building a healthy garden,
- Feeding the soil with non-chemical nutrients,
- Building a healthy ecosystem,
- Creating sustainability for your mini-farm and homestead, and
- To me, it’s just downright fun!
As we continue to look for resources to grow our knowledge in cover cropping, we recently came across a great educational DVD on cover cropping for the home garden that I just had to share. It’s Cindy Conner’s Cover Crops and Compost Crops IN Your Garden. In this DVD, Cindy walks us through a year in her garden from March to November and shows us how she uses cover crops to really improve her soil fertility and gain greater production from her garden with less work. In this and a few future posts, I’ll take you through several of my key notes from watching the video.
Year-Round Gardening with Cover Crops Concept
One of her overall concepts I especially like is the idea of year-round gardening using cover crops. No, this is not digging and harvesting and tending the garden in the winter months. But, it’s letting the cover crops silently do their work to protect and feed the soil in preparation for the growing time. It’s also using cover crops between planting to build and protect the soil for the next main crop. Plus, the cover crops provide an excellent source of biomass (both brown and green) for mulch or as a feed source for the ever-important compost pile. In essence, the cover crops you grow create a closed loop system for building soil fertility on your mini-farm reducing the need for brining in outside materials.
Garden Planning
Her year-round cover cropping plan is based on the idea that no garden soil should be left bare. The soil always wants to be covered, and if you don’t intentionally cover it, something will fill the void which will likely be unwanted weeds. Yuck! We should be more intentional about managing our soil by always having productive crops growing in all areas of our garden.
Gardening this way takes a little more effort in planning to ensure you have the right timing for the cover crops versus your main crops. You don’t want to have cereal rye growing in a bed or area where you plan on planting early lettuce for example. It would be a lot of work to get the thick rye out before planting the lettuce in early spring conditions. I found this out the hard way in one of my early experiments. Sure wish I had Cindy’s DVD then!
We should be planning better anyways, and with just a little more effort she says it will all come together. She even has another DVD that helps us with the planning process. I haven’t purchased that one yet as I’m going to try it on my own. I’ve been working on my revised plan recently and it does take a little more time to get my head around the timing aspect, but I’m sure after one or two iterations it will become second nature.
The primary cover crops Cindy uses and which I’ll talk more about in later posts are:
- Cereal rye
- Oats
- Wheat
- Hairy Vetch
- Medium Red Clover
- Alfalfa
- Field Peas
- Austrian Winter Peas
Key Planning Factors to Consider
As we think about putting together our sustainable garden plan, Cindy describes several key factors to prepare and consider. Some of these factors include:
- Develop a garden layout and number the planting areas of our gardens. It makes planning easier if we have a permanent bed structure as used in the John Jeavons Grow Biointensive gardening system. Cindy’s beds are 4 feet by 20 feet or 80 square feet each. This is the method I use. Our bed were prepared with help from our laying hens in chicken tractors that are 4 by 10.
- Plan the cover crop plantings around the crop rotation cycle. Many of us already know about rotating our crops to ensure the same plant families don’t grow in the same planting area year after year. This helps reduce disease and pest problems and soil nutrient drain. As an example, if we plan on planting corn in a bed next season, we should be planting a legume cover crop such as clover or vetch in that bed this season. These cover crops will provide nitrogen that the corn will need next season.
- Plan the right timing for the particular cover crops. As I mentioned before, Cindy instructs us to time the cover crop harvest to coincide with the planting of the main crop. Also, don’t leave a long space of time between harvesting the cover crop and planting the main crop so that the soil is not bare for too long to limit weed growth. If we have about a 30 day span delay, she recommends planting buckwheat as a cover crop in the interim.
Cindy has definitely packed a tremendous amount of information in this 66 minute DVD. Laura and I have already watched it several times since getting it a last week, and I have already started making several changes in this year’s garden plan to incorporate the techniques Cindy shares. Cindy also has some really good information in her blog, so be sure to check it out for more cover crop tips and techniques.
In my next post on cover cropping, I’ll talk more about my notes on the different crops she uses.